
Sweet & Salty White Trash Recipe To Create
Comfort food takes an unexpected turn with this white trash casserole that packs serious flavor into every single bite.
Southern kitchens have long celebrated these hearty, no-fuss dishes that deliver maximum satisfaction.
Layers of simple ingredients create a culinary experience that surprises and delights dinner companions.
Budget-friendly ingredients come together in a magical blend of textures and tastes.
Home cooks appreciate how quickly this dish comes together with minimal effort.
Each forkful promises a nostalgic journey through classic American comfort cooking.
Dive into this unpretentious recipe that transforms everyday ingredients into something truly memorable.
Quick Recipe Overview
What Goes Into White Trash
For Crunchy Base:For Sweet Coating:For Colorful Accent:Tools To Prepare White Trash Snack
Simple Steps For Making White Trash Sweet Mix
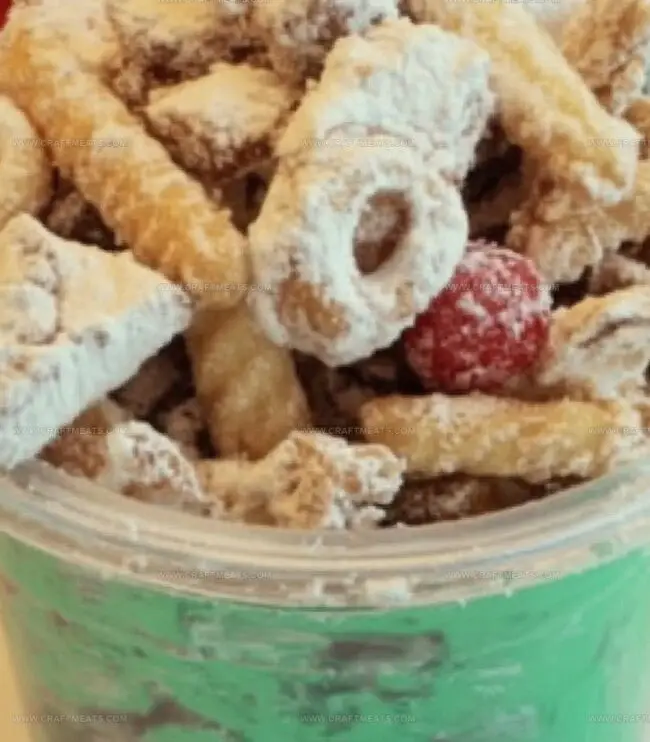
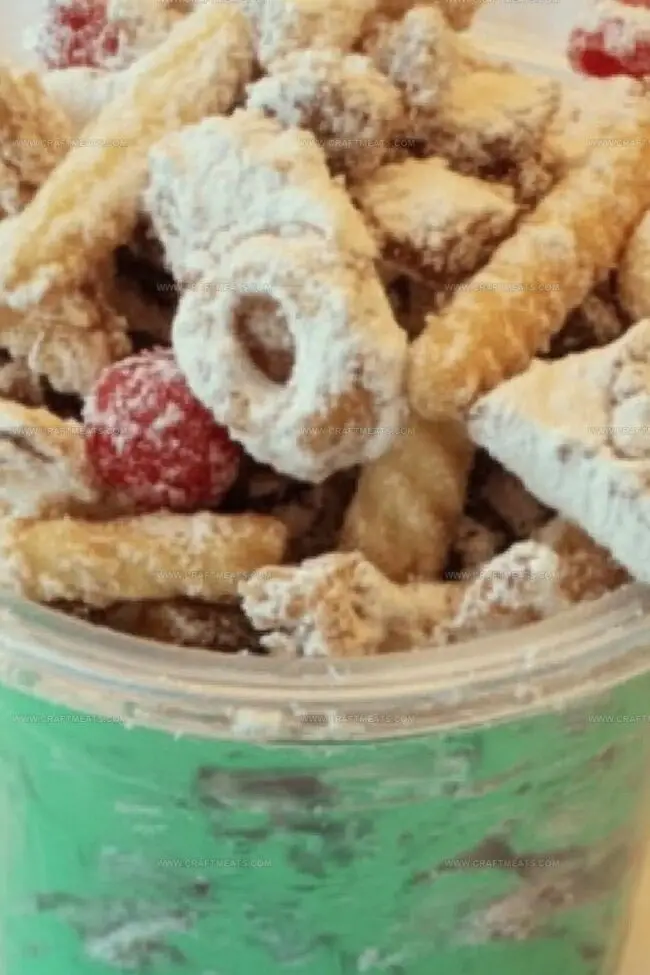
Grab a spacious bowl and toss together a playful mix of crunchy cereal, salty pretzels, nutty companions, and colorful chocolate candies. Gently swirl everything together so each bite promises a delightful surprise.
Melt white chocolate slowly in the microwave, stirring carefully between short bursts. Keep the heat gentle to prevent burning. The chocolate should become silky smooth with a luxurious sheen.
Drizzle the warm, melted chocolate over your crunchy mixture. Use a soft spatula to lovingly coat every single morsel, ensuring each piece gets a perfect chocolatey embrace.
Spread the glossy mixture onto a parchment-lined baking sheet. Let it rest and solidify at room temperature, allowing the chocolate to create a delicate, crisp shell around your snack.
Once the chocolate has completely hardened, break the mixture into bite-sized clusters. Each piece should be a perfect balance of sweet and salty crunch.
Transfer your creation to a serving bowl or sealed container. This irresistible treat will stay fresh and delicious for several days at room temperature.
Tips For The Crunchiest White Trash
Fun Ways To Serve White Trash For Parties
Keep White Trash Snack Mix Fresh And Crisp
Print
Trashy Comfort White Trash Recipe
- Total Time: 40 minutes
- Yield: 11 1x
Description
Sinful white trash recipe blends trailer park charm with gourmet indulgence. Quick-fix snack celebrates Southern creativity with unexpected ingredients, promising delicious results you’ll crave.
Ingredients
- 1.5 cups white chocolate chips or melting wafers (10 oz / 280 g)
- 1 tbsp vegetable oil or coconut oil (optional, for smoother melting)
- 3 cups Rice Chex or Corn Chex cereal
- 2 cups pretzels (mini twists or sticks)
- 1 cup salted peanuts (or mixed nuts)
- 1 cup M&Ms (holiday-themed for a festive touch)
Instructions
- Preparation: Assemble a large mixing bowl and gather Rice Chex, pretzels, peanuts, and M&Ms to create a harmonious blend of textures and flavors.
- Mixing: Gently fold the dry ingredients together, ensuring an even distribution throughout the container, creating a colorful and inviting base.
- Chocolate Transformation: Use a microwave or double boiler to melt white chocolate chips, stirring carefully to achieve a smooth, glossy consistency without burning.
- Coating: Drizzle the liquefied white chocolate over the dry ingredients, using a silicone spatula to thoroughly and uniformly coat every morsel with a luxurious chocolate layer.
- Setting: Spread the coated mixture onto a parchment-lined baking sheet in a thin, consistent layer, then allow it to set at room temperature or expedite the process by placing it in the refrigerator.
- Portioning: Once fully hardened, break the consolidated mixture into rustic, bite-sized clusters using gentle hand movements, creating an artisanal and appealing presentation.
- Storage: Transfer the finished treat to a decorative serving bowl or airtight container, preserving its crisp texture and ensuring optimal enjoyment for up to one week.
Notes
- Prevent Chocolate Burning: Melt white chocolate slowly using low heat, stirring frequently to avoid scorching and maintain smooth texture.
- Ensure Even Coating: Use a silicone spatula to gently fold ingredients, guaranteeing each piece gets completely covered with white chocolate for consistent flavor.
- Control Cooling Speed: Let mixture set at room temperature for natural hardening, or refrigerate for faster setting, depending on time constraints and desired texture.
- Store Strategically: Keep in airtight container at room temperature for maximum freshness, consuming within a week to maintain crisp quality and prevent staleness.
- Prep Time: 10 minutes
- Cook Time: 30 minutes
- Category: Snacks
- Method: Mixing
- Cuisine: American
Nutrition
- Serving Size: 11
- Calories: 190
- Sugar: 15 g
- Sodium: 180 mg
- Fat: 9 g
- Saturated Fat: 5 g
- Unsaturated Fat: 4 g
- Trans Fat: 0 g
- Carbohydrates: 24 g
- Fiber: 1 g
- Protein: 2 g
- Cholesterol: 0 mg
Liam O’Sullivan
Founder & Culinary Content Creator
Expertise
Recipe Development, Traditional Irish and European Cuisines, Food Styling and Photography, Culinary Education
Education
Dublin Institute of Technology (DIT) – School of Culinary Arts and Food Technology
Ballymaloe Cookery School
Isabella brings a global spark to the Craft Meats table. Born in Florence and trained at the Apicius International School of Hospitality, she blends classic Italian flavor with modern writing that’s easy to follow and hard to forget.
Her additional training at the Italian Chef Academy fueled her love for well-crafted dishes, especially ones that spotlight beautiful cuts of meat.
She’s a food writer with heart, and a deep love for storytelling through single recipes. Her goal? To help you cook with more confidence and a little more joy, no matter where you start.