Red Velvet Cheesecake Brownie Bars Recipe to Indulge In
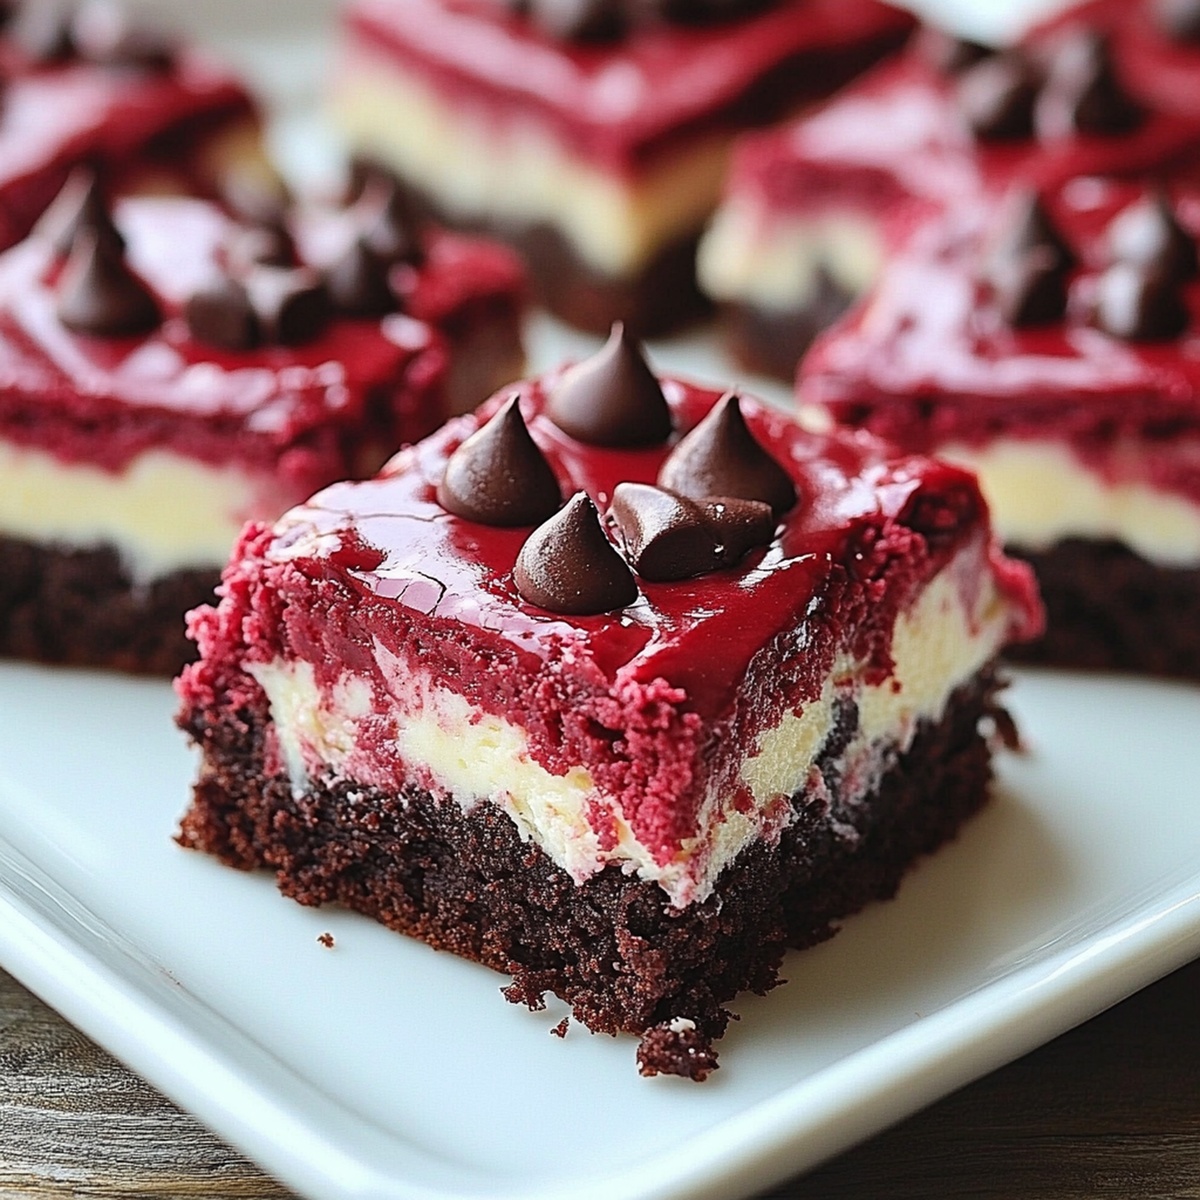
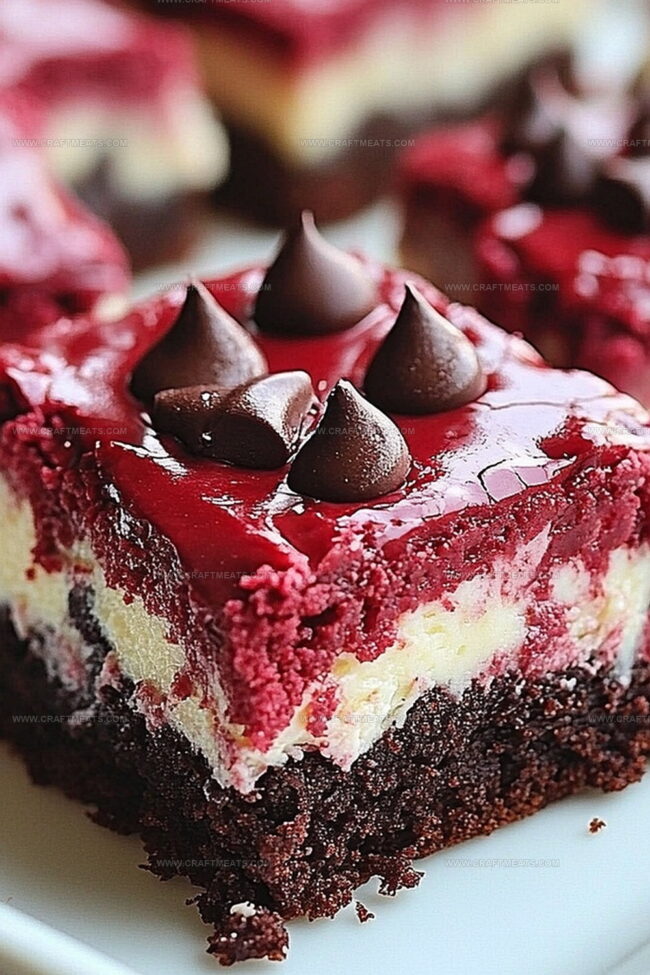
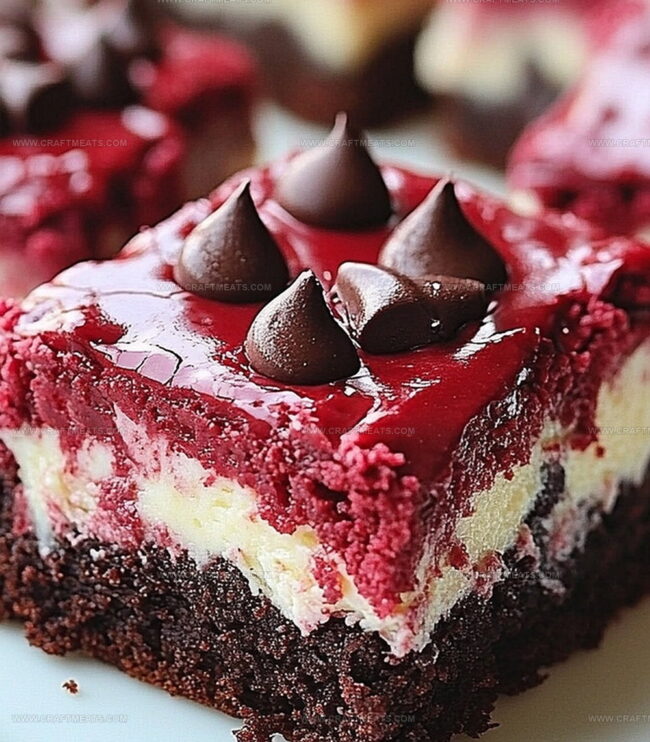
Red velvet cheesecake brownie bars blend two decadent desserts into one irresistible treat.
The classic red velvet flavor swirls perfectly with rich, creamy cheesecake and fudgy brownie layers.
Chocolate lovers will melt at the first bite of these stunning bars.
Each slice promises a luxurious combination of textures and deep, indulgent flavors.
The vibrant red color adds a stunning visual appeal that makes these bars impossible to resist.
Guests will be impressed by the elegant marbled appearance and complex taste profile.
Prepare to wow everyone with this show-stopping dessert that elevates your baking game.
Quick Recipe Overview
Ingredients For Red Velvet Cheesecake Brownie Bars
For Base and Structure:For Moisture and Binding:For Color and Flavor Enhancement:Kitchen Tools For Red Velvet Cheesecake Brownie Bars
How To Bake Red Velvet Cheesecake Brownie Bars Smoothly
Warm up the oven to a cozy 350F. Line a baking dish with parchment paper, creating little handles for easy lifting later.
Mix melted butter and sugar into a silky smooth blend. Splash in eggs, vanilla, and a dash of vibrant red color. Gently fold cocoa powder, flour, and a pinch of salt into the mixture. Pour this gorgeous crimson batter into the prepared pan, spreading it with love.
Whip cream cheese until it becomes dreamy and soft. Blend in sugar, egg, and vanilla until everything looks perfectly smooth. Pour this cloud-like mixture over the red velvet foundation.
Dot small patches of remaining red batter across the cheesecake surface. Dance a toothpick through these spots, creating a mesmerizing marble effect that looks like edible artwork.
Slide the pan into the warm oven. Bake for 30-35 minutes until the center looks set and stable. Let the bars cool completely, then chill in the refrigerator for a couple of hours to firm up.
Lift the bars out using the parchment paper edges. Slice into squares and enjoy these decadent treats chilled or at room temperature.
Flavor Twists For Red Velvet Cheesecake Brownie Bars
Ways To Serve Red Velvet Cheesecake Brownie Bars Creatively
Storing Red Velvet Cheesecake Brownie Bars Without Drying
Print
Velvety Red Velvet Cheesecake Brownie Bars Recipe
- Total Time: 2 hours 50 minutes
- Yield: 11 1x
Description
Red velvet cheesecake brownie bars blend luxurious dessert layers with rich chocolate and cream cheese. Chocolate lovers will savor this indulgent Southern-inspired treat that promises delightful complexity in each elegant square.
Ingredients
- 3 large eggs
- 1 ⅓ cups (265 g) granulated sugar
- 8 oz (225 g) cream cheese, softened
- ½ cup (115 g) unsalted butter, melted
- ¾ cup (95 g) all-purpose flour
- ¼ cup (25 g) unsweetened cocoa powder
- ¼ tsp salt
- 1 tbsp red food coloring
- 1 ½ tsp vanilla extract
Instructions
- Preparation: Line an 8×8-inch baking dish with parchment paper, allowing overhang for easy removal. Preheat oven to 350°F (175°C), positioning rack in the center.
- Brownie Base: Whisk melted butter with granulated sugar until smooth. Blend in eggs, vanilla extract, and red food coloring. Fold sifted cocoa powder, flour, and salt into the mixture, maintaining a delicate texture. Spread batter evenly in the prepared pan, reserving a small portion for swirling.
- Cheesecake Layer: Beat cream cheese and sugar until velvety. Incorporate egg and vanilla extract, mixing until fully combined. Gently pour cheesecake mixture over the red velvet base, ensuring complete coverage.
- Marbling: Dot reserved red velvet batter across the cheesecake surface. Use a toothpick or thin knife to create intricate swirls, generating an artistic pattern.
- Baking: Slide the pan into the preheated oven. Bake for 30-35 minutes, monitoring for a set center and clean toothpick test.
- Cooling and Setting: Remove from oven and cool completely at room temperature. Refrigerate for at least 2 hours to achieve optimal consistency and flavor melding.
- Serving: Extract the dessert from the pan using parchment paper edges. Slice into precise squares, revealing the stunning red velvet and cheesecake layers.
Notes
- Prevent Overmixing: Gently fold dry ingredients into wet mixture to maintain a light, tender brownie texture without developing tough gluten strands.
- Color Calibration: Use gel food coloring for vibrant red hue without thinning the batter, ensuring rich color and consistent consistency.
- Temperature Control: Allow cream cheese to reach room temperature before mixing to create smoother, lump-free cheesecake layer and ensure even blending.
- Swirling Technique: Use a toothpick or thin knife with gentle, fluid motions when creating marbled effect to avoid over-mixing and maintain distinct color separation.
- Prep Time: 15 minutes
- Cook Time: 35 minutes
- Category: Desserts, Snacks
- Method: Baking
- Cuisine: American
Nutrition
- Serving Size: 11
- Calories: 290
- Sugar: 22 g
- Sodium: 160 mg
- Fat: 15 g
- Saturated Fat: 9 g
- Unsaturated Fat: 6 g
- Trans Fat: 0 g
- Carbohydrates: 36 g
- Fiber: 1 g
- Protein: 4 g
- Cholesterol: 70 mg
Liam O’Sullivan
Founder & Culinary Content Creator
Expertise
Recipe Development, Traditional Irish and European Cuisines, Food Styling and Photography, Culinary Education
Education
Dublin Institute of Technology (DIT) – School of Culinary Arts and Food Technology
Ballymaloe Cookery School
Isabella brings a global spark to the Craft Meats table. Born in Florence and trained at the Apicius International School of Hospitality, she blends classic Italian flavor with modern writing that’s easy to follow and hard to forget.
Her additional training at the Italian Chef Academy fueled her love for well-crafted dishes, especially ones that spotlight beautiful cuts of meat.
She’s a food writer with heart, and a deep love for storytelling through single recipes. Her goal? To help you cook with more confidence and a little more joy, no matter where you start.