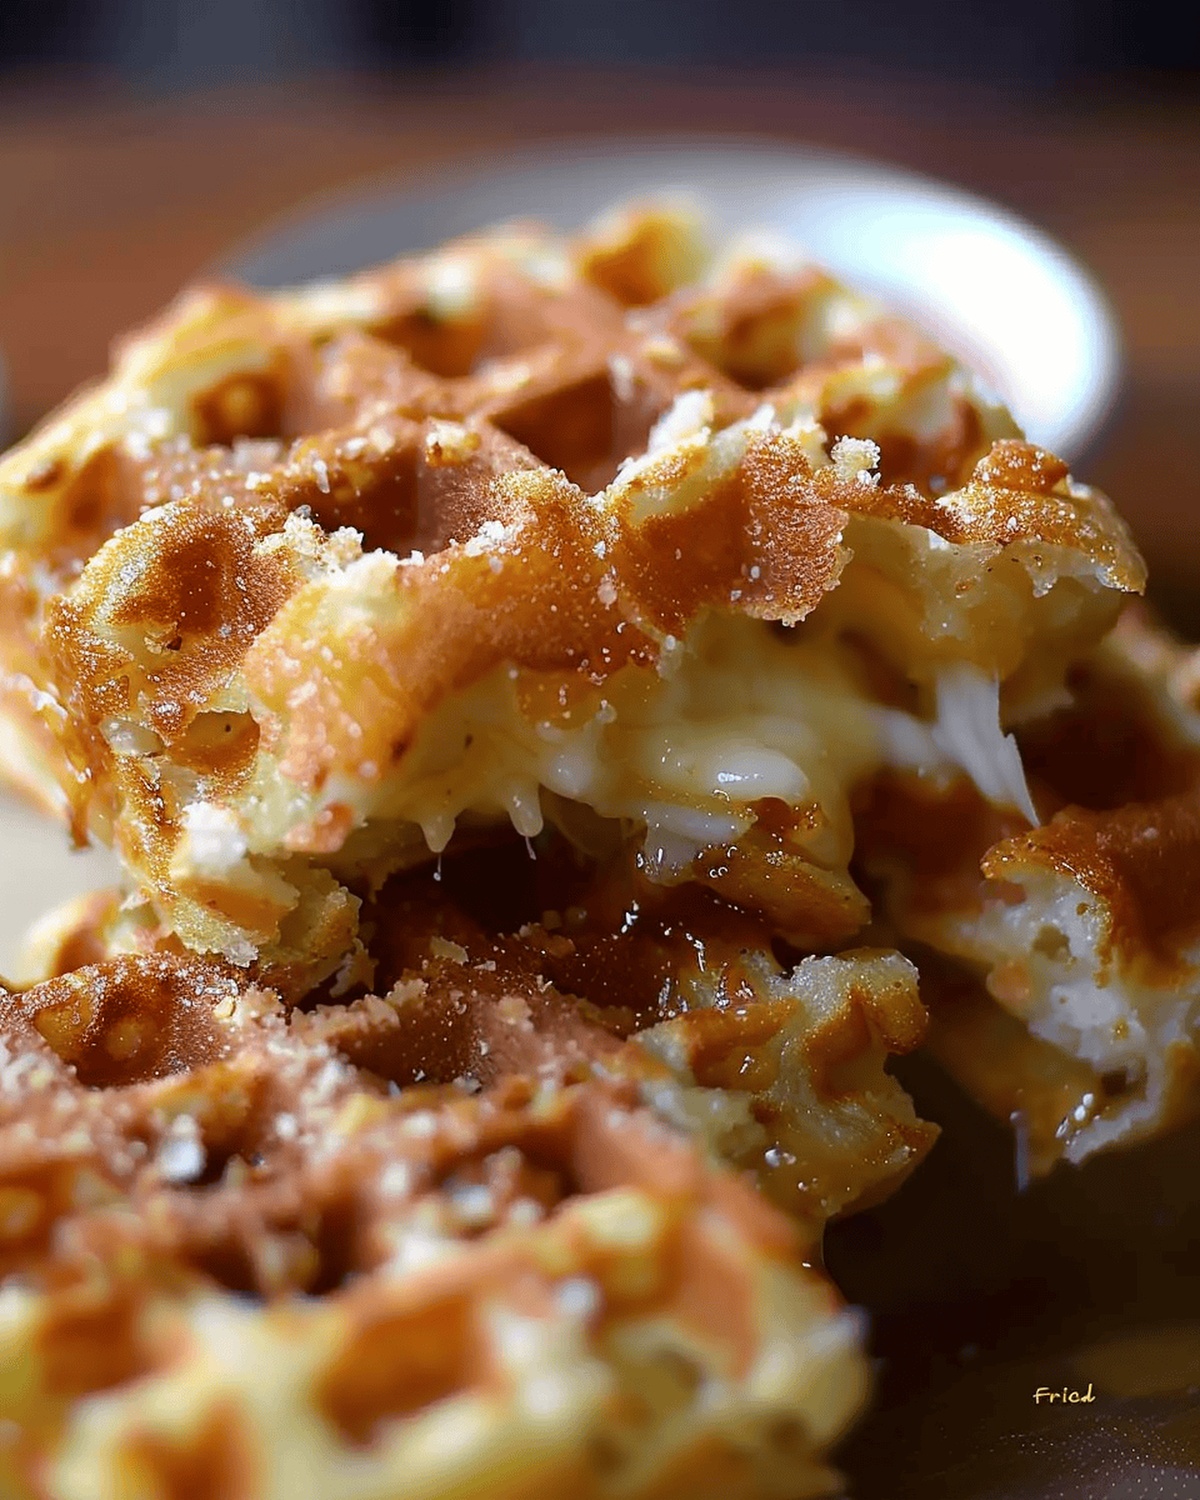
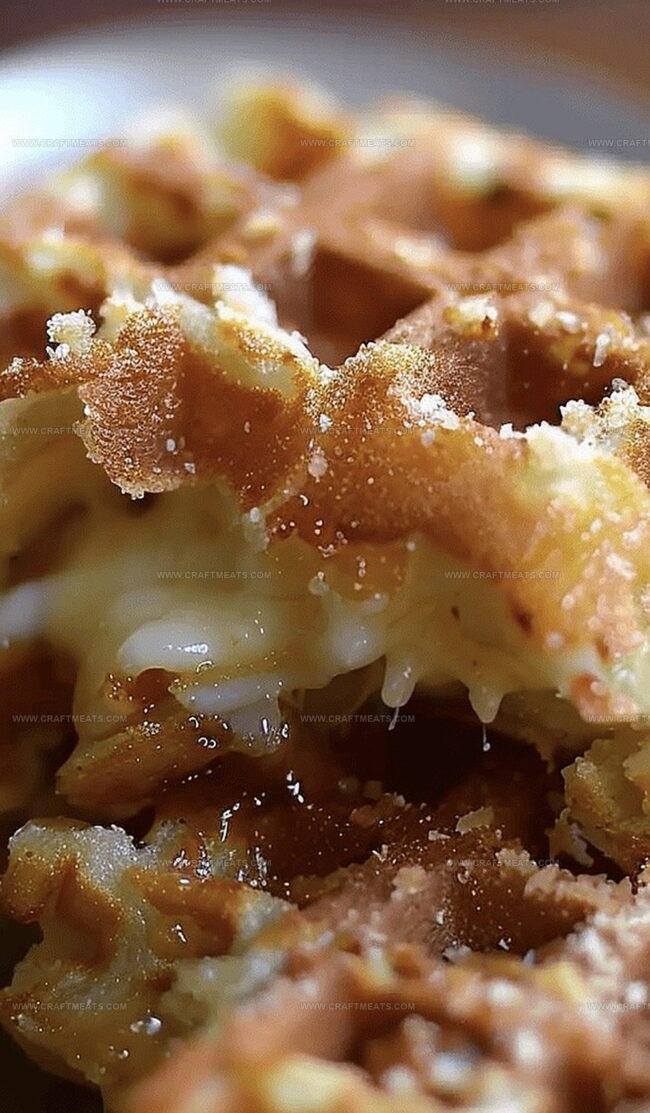
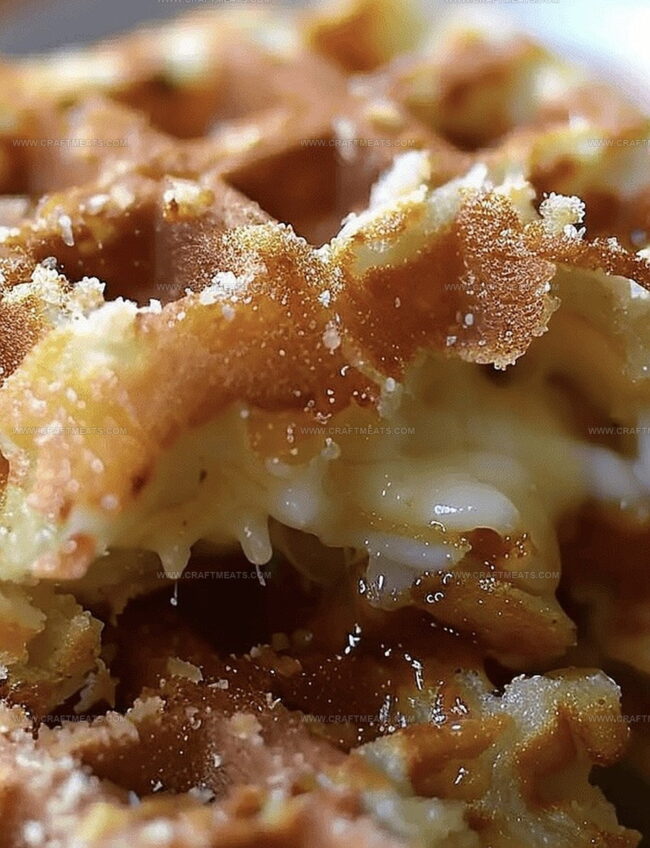
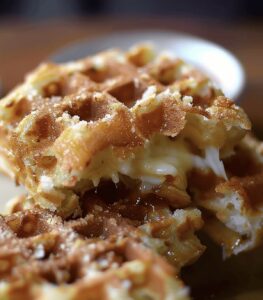
Crispy waffle iron fried cheese tantalizes taste buds with its golden, melted perfection.
Unexpected kitchen tools reimagine ordinary ingredients into extraordinary culinary experiences.
Melted cheese creates a delightful exterior that crackles with each bite.
Versatile and quick, this method brings excitement to traditional cooking techniques.
Comfort food enthusiasts will appreciate the simplicity and unexpected charm of this technique.
Professional chefs and home cooks alike can master this delectable trick with minimal effort.
The result combines crisp texture with rich, gooey cheese in every mouthwatering morsel.
Why Waffle Iron “Fried” Cheese (Queso Frito) Is Your Crispy Cheese Dream
Unlock Crispy Cheese Magic: Transform ordinary mozzarella into a crunchy, golden delight using your waffle iron, creating a unique twist on traditional fried cheese that delivers maximum flavor with minimal effort.
Rapid-Fire Cooking Technique: Achieve perfectly crisp exterior and melty interior in just one minute, making this recipe an ideal solution for quick snacks, appetizers, or unexpected cravings without deep-frying.
Customizable Flavor Adventure: Experiment with different cheese varieties like cheddar or gouda, adjust spice levels by playing with paprika or cayenne, and personalize your coating to match your taste preferences, ensuring every batch feels fresh and exciting.
Minimal Equipment, Maximum Enjoyment: Utilize a common kitchen appliance (waffle iron) to create restaurant-quality appetizers, turning an ordinary cooking tool into a versatile cheese-crisping marvel that impresses friends and family with minimal cleanup.
Ingredients for Waffle Iron “Fried” Cheese (Queso Frito)
Cheese Coating Ingredients:
All-Purpose Flour, Paprika: Dry mixture creates a light, flavorful seasoned base for the cheese, with paprika adding a warm, slightly smoky taste.
Cayenne Pepper: Optional spice for those who enjoy a bit of heat in their cheese coating.
Cheese Base:
Low-Moisture Mozzarella: Firm cheese that holds its shape well during cooking, best when sliced evenly for consistent results.
Binding and Crispy Coating Ingredients:
Large Eggs: Beaten eggs act as a crucial binding agent to help breading stick to the cheese.
Bread Crumbs: Provides a crispy, golden exterior that adds delightful texture to the fried cheese.
Additional Ingredients:
Nonstick Cooking Spray: Ensures easy release from the waffle iron and prevents sticking.
Salsa: Optional fresh condiment to complement the crispy cheese.
How to Make Waffle Iron “Fried” Cheese at Home
Step 1: Warm Up The Waffle Maker
Plug in your waffle iron and set it to medium heat. Give it a few minutes to warm up completely. Lightly spray both cooking surfaces with nonstick cooking spray to prevent sticking.
Step 2: Create Coating Stations
Prepare three separate plates for coating the cheese:
First plate: Flour mixed with spices
Second plate: Beaten eggs
Third plate: Bread crumbs
Step 3: Prepare Cheese Coating Mix
Combine in the first plate:
All-purpose flour
Paprika
Cayenne pepper (optional)
Salt
Black pepper
Step 4: Dredge Cheese Slices
Take each cheese slice and follow this coating sequence:
Coat completely in seasoned flour
Dip into beaten eggs
Roll in bread crumbs, pressing gently to ensure full coverage
Step 5: Cook Cheese Slices
Place coated cheese slices in the preheated waffle iron:
Avoid overcrowding
Close lid gently
Cook for 1-2 minutes until golden brown and crispy
Cheese should start melting inside
Step 6: Remove And Rest
Carefully remove cheese slices using a heat-resistant spatula. Let them rest on a paper towel for 30 seconds to absorb excess oil.
Step 7: Serve And Enjoy
Plate the crispy cheese slices immediately:
Serve with salsa
Sprinkle with fresh herbs
Add a squeeze of lime for extra flavor
Tips for Getting That Golden Crust on Waffle Iron Queso Frito
Chill the Cheese: Freeze mozzarella slices for 10-15 minutes before coating to help them maintain shape during cooking and prevent excessive melting.
Perfect Coating Technique: Press bread crumbs firmly onto cheese to create a thick, even layer that ensures maximum crispiness and prevents gaps in the coating.
Control Cooking Time: Watch closely while cooking, as cheese can quickly go from perfectly crisp to burnt; aim for a golden-brown exterior with a gooey, melted center.
Choose the Right Cheese: Select firm cheeses like mozzarella, halloumi, or queso fresco that hold their shape and melt beautifully under heat.
Clean Waffle Iron Immediately: Wipe down the waffle iron with a damp cloth while still warm to prevent cheese from hardening and becoming difficult to remove.
How to Store and Reheat Waffle Iron “Fried” Cheese Without Losing Crunch
Refrigerate: Store leftover cheese slices in an airtight container for up to 3 days. Place parchment paper between layers to prevent sticking.
Reheat in Oven: Preheat oven to 375°F. Arrange cheese slices on a baking sheet lined with parchment paper. Bake for 5-7 minutes until crispy and heated through.
Air Fryer Option: Warm cheese slices in air fryer at 350°F for 3-4 minutes, turning halfway to ensure even crispiness. This method helps maintain the original crunchy texture.
What to Serve with Waffle Iron “Fried” Cheese
Ignite Mediterranean Magic: Pair this crispy queso frito with a chilled glass of crisp Spanish albariño white wine, which cuts through the rich cheese with its bright, citrusy notes and refreshing acidity.
Salsa Dance Party: Serve alongside a zesty homemade salsa verde or roasted tomato salsa that provides a tangy, spicy counterpoint to the golden, melty cheese bites, creating a flavor explosion in every bite.
Casual Fiesta Companion: Match these waffle iron cheese treats with a light Mexican lager like Modelo Especial or Corona, whose clean, slightly hoppy profile complements the crispy, cheesy texture without overwhelming the delicate cheese flavor.
Fresh Green Sidekick: Create a simple mixed green salad with a lime-cilantro vinaigrette to bring freshness and brightness, balancing the richness of the fried cheese and adding a vibrant contrast to the plate.
Delicious Variations of Waffle Iron Queso Frito to Try
Spicy Southwest Queso: Blend jalapeños and chili powder into bread crumbs for a fiery kick, then serve with fresh cilantro-lime salsa.
Mediterranean Herb Cheese: Mix dried oregano, basil, and thyme into bread crumbs, using feta or halloumi cheese for a tangy Mediterranean flavor profile.
Smoky BBQ Crunch: Incorporate smoked paprika and BBQ seasoning into bread crumbs, then pair with a zesty barbecue dipping sauce for added depth.
Parmesan Garlic Crisp: Combine grated parmesan and garlic powder in bread crumbs, creating an aromatic and savory cheese variation that pairs wonderfully with marinara sauce.
Queso frito sizzles with Latin American charm, delivering crispy golden cheese perfection. Melted cheese hugs a crunchy exterior, inviting you to savor this irresistible Colombian street snack that brings delicious simplicity to your plate.
Ingredients
Scale
Main Ingredients:
½ pound (226 grams) low-moisture mozzarella, sliced about ½ inch thick
2 large eggs, beaten
½ cup (60 grams) bread crumbs
Flour and Spice Coating:
3 tablespoons (24 grams) all-purpose flour
½ teaspoon paprika, or a pinch of cayenne pepper
Cooking Preparation:
Nonstick cooking spray
Salsa, for serving (optional)
Instructions
Ready the waffle iron to medium heat, ensuring it’s thoroughly preheated and lightly coated with nonstick spray to prevent cheese from sticking.
Create three distinct coating stations: one with seasoned flour, another with whisked eggs, and the final station with crisp bread crumbs for complete cheese coverage.
Meticulously dredge each mozzarella slice through the flour mixture, shaking off excess. Immediately submerge the floured cheese into beaten eggs, allowing minimal dripping.
Carefully press the egg-coated cheese into bread crumbs, rotating to achieve comprehensive and even coating that will transform into a crunchy exterior.
Strategically position coated cheese slices inside the waffle iron, maintaining adequate spacing to prevent overcrowding and ensuring uniform crispiness.
Close the waffle iron lid and cook for approximately 60-90 seconds, watching for a rich golden-brown color and visible cheese melting.
Gently remove the crispy cheese using heat-resistant utensils, transferring to a serving plate that can capture any delightful melted edges.
Optionally accompany with zesty salsa or your preferred dipping sauce to complement the rich, melted cheese and enhance overall flavor profile.
Experiment with alternative cheese varieties like cheddar or gouda to discover unique taste combinations and textures.
Notes
Experiment with varied cheese types like cheddar or gouda for different flavor profiles.
Spice up the bread crumbs with extra cayenne or chili flakes for a zesty kick.
Quick cooking method transforms ordinary cheese into a crispy, golden appetizer perfect for spontaneous snacking or party gatherings.
Recipe Development, Traditional Irish and European Cuisines, Food Styling and Photography, Culinary Education
Education
Dublin Institute of Technology (DIT) – School of Culinary Arts and Food Technology
Degree: Bachelor of Arts in Culinary Arts
Focus: Comprehensive training in classical and modern cooking techniques, kitchen management, and menu development.
Ballymaloe Cookery School
Program: 12-Week Certificate Course
Focus: Intensive, hands-on experience emphasizing farm-to-table cooking and sustainable practices.
Liam is the voice behind many of Craft Meats’ most flavorful features. With roots in Dublin’s smoky barbecue scene and a culinary degree from the Dublin Institute of Technology, he brings time-tested cooking techniques to life.
His training at Ballymaloe Cookery School sharpened his farm-to-table approach, giving him a deep respect for every ingredient he writes about.
He’s not about overcomplicating the process, just helping you cook meat that’s worth talking about. When he’s not writing or grilling, he’s out foraging or nerding out on regional spice blends to add to his next recipe.
Isabella Rossi
Founder & Culinary Content Creator
Expertise
Recipe Development, Traditional Irish and European Cuisines, Food Styling and Photography, Culinary Education
Education
Dublin Institute of Technology (DIT) – School of Culinary Arts and Food Technology
Ballymaloe Cookery School
Liam is the voice behind many of Craft Meats’ most flavorful features. With roots in Dublin’s smoky barbecue scene and a culinary degree from the Dublin Institute of Technology, he brings time-tested cooking techniques to life.
His training at Ballymaloe Cookery School sharpened his farm-to-table approach, giving him a deep respect for every ingredient he writes about.
He’s not about overcomplicating the process, just helping you cook meat that’s worth talking about. When he’s not writing or grilling, he’s out foraging or nerding out on regional spice blends to add to his next recipe.