
Martha Washington Candy Recipe That’s Timelessly Sweet
Sweet memories of holiday gatherings dance through kitchens across america with this martha washington candy recipe.
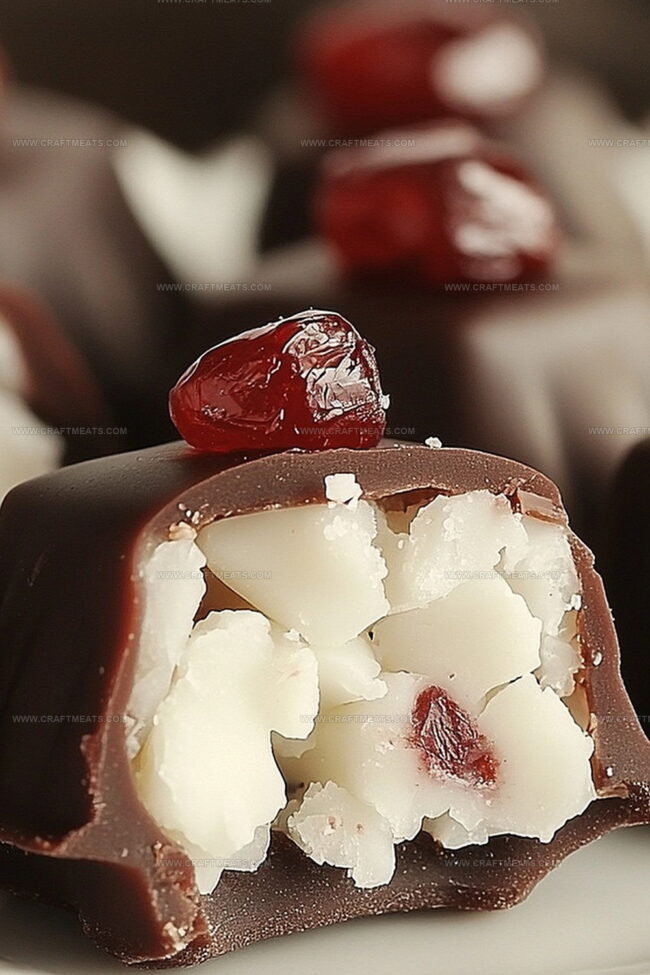
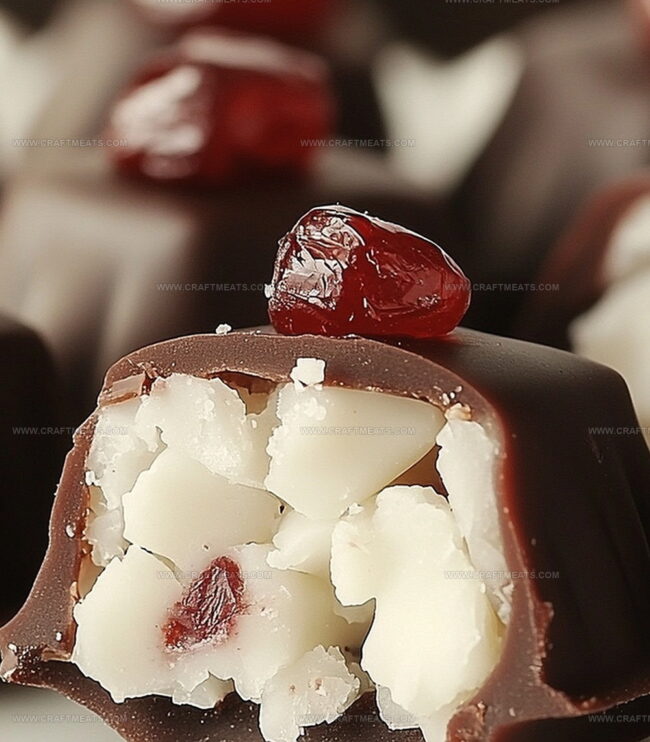
Generations have savored these delectable coconut-studded confections passed down through beloved family cookbooks.
The subtle blend of creamy sweetness captures nostalgic moments of celebration and warmth.
Rich chocolate and smooth coconut create a delightful texture that melts in your mouth.
These no-bake treats come together with simple ingredients and minimal effort.
Chocolate lovers will adore the decadent coating that envelops each tender candy piece.
Prepare to delight your taste buds with this classic confection that promises pure indulgence.
Quick Recipe Overview
Everything Needed For Martha Washington Candy
For Filling Base:For Texture and Crunch:For Coating and Finishing:Tools You’ll Want For Martha Washington Candy
Steps To Make Martha Washington Candy Simple
Whip together soft butter and sweet milk until silky smooth. Splash in vanilla essence and gradually fold in powdered sugar, creating a rich, sticky mixture. Gently mix in coconut flakes and crunchy pecan bits for irresistible texture.
Roll the mixture into tiny spheres using your palms. Nestle these delicate balls onto a parchment-lined tray and chill in the cold embrace of your refrigerator until firm and compact.
Melt chocolate using gentle heat, stirring until glossy and smooth. This luxurious coating will transform your candies into elegant treats.
Carefully submerge each chilled ball into the molten chocolate. Lift and let excess chocolate cascade back, creating a perfect, even layer. Place each coated morsel onto the parchment with delicate precision.
Allow the chocolate to set naturally at room temperature. Once hardened, transfer these decadent morsels to a sealed container. Keep cool and enjoy your homemade confectionery masterpiece.
Tips To Boost Martha Washington Candy Flavor
Serving Ideas For Martha Washington Candy
How To Keep Martha Washington Candy Fresh
Print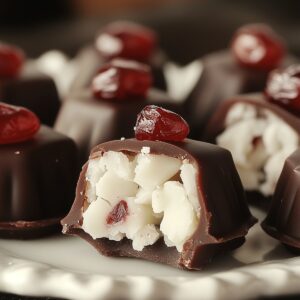
Decadent Martha Washington Candy Recipe
- Total Time: 1 hour 30 minutes
- Yield: 35 1x
Description
Martha Washington candy showcases a delightful blend of coconut, pecans, and chocolate from American culinary traditions. Sweet confections like these offer nostalgic connections to classic homemade desserts you’ll savor with each delectable bite.
Ingredients
- 2 lbs (900 g) powdered sugar, sifted
- 2 cups (160 g) sweetened shredded coconut
- 1 ½ cups (180 g) chopped pecans
- 1 cup (225 g) unsalted butter, softened
- 1 can (14 oz or 397 g) sweetened condensed milk
- 2 tsps vanilla extract
- 24 oz (680 g) semi-sweet or milk chocolate chips
- 2 tbsps vegetable shortening (optional, for a smoother coating)
Instructions
- Mixture Preparation: Whisk softened butter and sweetened condensed milk until smooth and uniform. Blend in vanilla extract for aromatic depth.
- Dough Formation: Fold powdered sugar into the mixture, creating a dense, pliable consistency. Incorporate shredded coconut and chopped pecans, ensuring even distribution throughout the dough.
- Shaping Process: Mold the mixture into small, uniform spheres using a tablespoon. Arrange the candy orbs on a parchment-lined tray, maintaining a neat configuration. Refrigerate or freeze for about an hour to solidify the candies’ structure.
- Chocolate Coating: Melt chocolate chips with vegetable shortening using a double boiler or microwave, stirring until achieving a smooth, glossy texture. Completely submerge each chilled candy sphere in the molten chocolate, allowing excess to drip off.
- Final Presentation: Delicately place chocolate-coated candies on the parchment-lined surface. Allow chocolate to set at room temperature or expedite by refrigerating. Once hardened, transfer the completed Martha Washington Candies to an airtight container for storage and preservation.
Notes
- Butter Temperature Matters: Ensure butter is softened but not melted to achieve the perfect creamy texture for the candy base.
- Sugar Incorporation Technique: Add powdered sugar gradually and mix thoroughly to prevent lumps and create a smooth, consistent mixture.
- Chilling is Crucial: Refrigerate or freeze the candy balls before dipping in chocolate to help them maintain shape and prevent crumbling during coating.
- Chocolate Coating Pro Tip: Use a fork or dipping tool to smoothly coat candies, letting excess chocolate drip off for a clean, professional finish.
- Prep Time: 30 minutes
- Cook Time: 1 hour
- Category: Desserts, Snacks
- Method: Mixing
- Cuisine: American
Nutrition
- Serving Size: 35
- Calories: 200
- Sugar: 18 g
- Sodium: 30 mg
- Fat: 12 g
- Saturated Fat: 7 g
- Unsaturated Fat: 4 g
- Trans Fat: 0 g
- Carbohydrates: 24 g
- Fiber: 1 g
- Protein: 2 g
- Cholesterol: 15 mg
Liam O’Sullivan
Founder & Culinary Content Creator
Expertise
Recipe Development, Traditional Irish and European Cuisines, Food Styling and Photography, Culinary Education
Education
Dublin Institute of Technology (DIT) – School of Culinary Arts and Food Technology
Ballymaloe Cookery School
Isabella brings a global spark to the Craft Meats table. Born in Florence and trained at the Apicius International School of Hospitality, she blends classic Italian flavor with modern writing that’s easy to follow and hard to forget.
Her additional training at the Italian Chef Academy fueled her love for well-crafted dishes, especially ones that spotlight beautiful cuts of meat.
She’s a food writer with heart, and a deep love for storytelling through single recipes. Her goal? To help you cook with more confidence and a little more joy, no matter where you start.