
Homemade No Bake Chocolate Oat Bars Recipe: Sweet Joy in Minutes
When chocolate meets oats in this no bake chocolate oat bars recipe, magic happens in the kitchen.
Sweet treats don’t get much easier than these delightful bars.
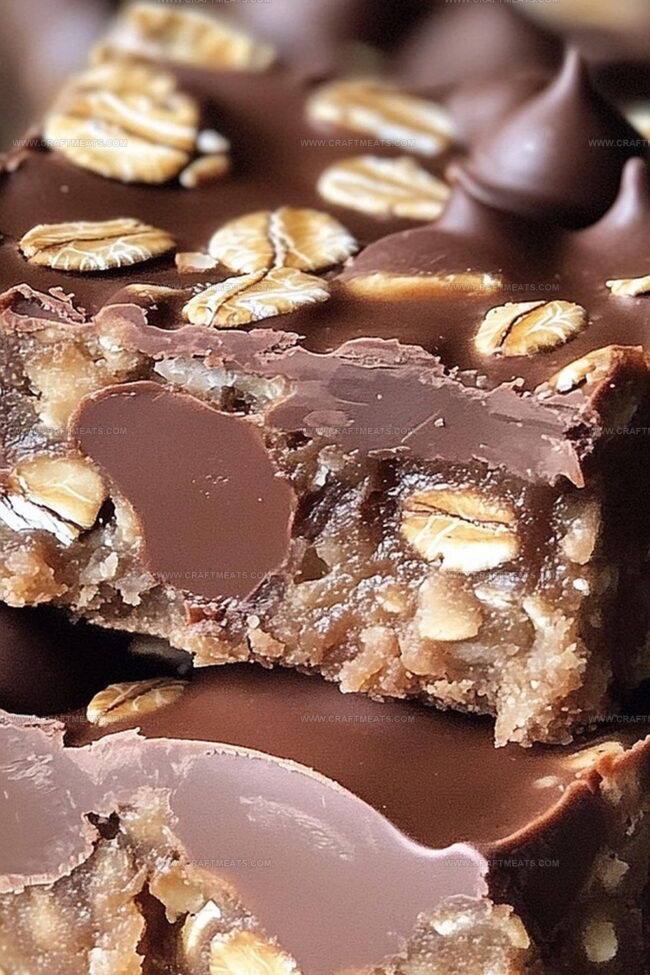
The rich chocolate layers meld perfectly with hearty oats, creating a decadent dessert that requires zero oven time.
Minimal ingredients come together in mere minutes to craft these irresistible squares.
Each bite delivers a satisfying crunch balanced with smooth chocolate goodness.
No complicated steps stand between you and pure indulgence.
Dive into this simple yet spectacular dessert that will become your new favorite go-to treat.
Quick Recipe Overview
Everything In No Bake Chocolate Oat Bars
For Oat Base:For Chocolate Filling:For Optional Topping:Kitchen Items For No Bake Chocolate Oat Bars
Steps To Prepare No Bake Chocolate Oat Bars
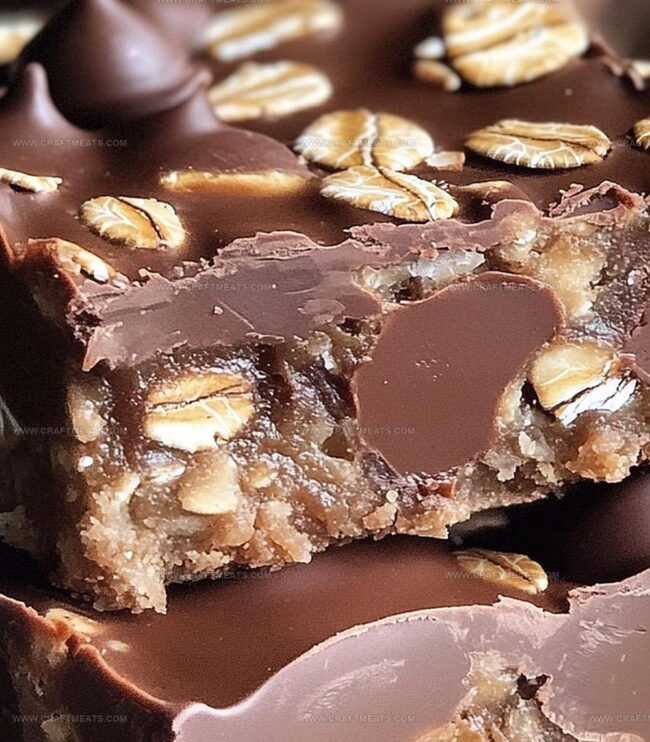
Create a delicious base using warm, melted butter blended with sweet brown sugar. Toast rolled oats in this mixture until they’re golden and aromatic, releasing a nutty fragrance that hints at the delectable treat to come.
Melt chocolate chips and creamy peanut butter together into a silky smooth mixture. Watch as they transform into a glossy, rich layer that will make taste buds dance with excitement.
Press half of the toasted oat mixture into the bottom of a baking dish, creating a sturdy foundation. Carefully pour the molten chocolate over this base, ensuring an even, tempting coverage.
Sprinkle the remaining oat mixture across the chocolate landscape, gently pressing to create a beautiful, rustic topping that adds texture and crunch.
Slide the creation into the refrigerator and let it rest. The waiting is part of the magic – patience will reward you with a perfectly set, wonderfully cool dessert that’s ready to be sliced and savored.
Tips To Enhance No Bake Chocolate Oat Bars
Ways To Share No Bake Chocolate Oat Bars
How To Store No Bake Chocolate Oat Bars
Print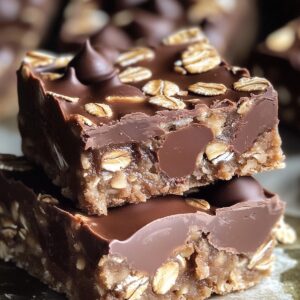
Heavenly No Bake Chocolate Oat Bars Recipe
- Total Time: 2 hours 10 minutes
- Yield: 15 1x
Description
Delectable no bake chocolate oat bars combine creamy peanut butter with rich chocolate for an irresistible treat. Sweet layers meld together effortlessly, promising quick satisfaction without heating an oven. These bars will delight you.
Ingredients
- 1 cup (225 g) unsalted butter
- ½ cup (100 g) brown sugar, packed
- ½ cup (125 g) creamy peanut butter
- 3 cups (240 g) rolled oats
- 1 ½ cups (265 g) semisweet chocolate chips
- 1 teaspoon (5 ml) vanilla extract
Instructions
- Oat Base Preparation: Melt butter in a saucepan and incorporate brown sugar and vanilla, creating a rich, aromatic foundation. Gently fold in rolled oats, ensuring each grain is evenly coated and slightly glossy.
- Pan Setup: Line a baking dish with parchment paper or apply a thin grease layer. Press half of the oat mixture firmly into the pan, creating a compact, uniform base using a spatula.
- Chocolate Layer Creation: Combine chocolate chips and peanut butter in a microwave-safe bowl. Heat in short bursts, stirring between intervals, until the mixture becomes a smooth, glossy chocolate coating.
- Layering Process: Pour the molten chocolate evenly over the oat foundation, using careful strokes to distribute the mixture completely across the surface.
- Final Oat Topping: Sprinkle the remaining oat mixture over the chocolate layer, gently pressing down to create a cohesive, integrated top layer that bonds with the chocolate beneath.
- Chilling and Setting: Refrigerate the bars for two hours or until they achieve a firm, solid consistency that holds its shape when cut.
- Serving Preparation: Remove the chilled bars from the refrigerator using the parchment paper edges. Slice into precise squares or rectangles. Store in an airtight container in the refrigerator for up to one week, maintaining optimal texture and flavor.
Notes
- Prevent Burning Butter: Melt butter on low heat, stirring constantly to avoid scorching and ensure smooth, even consistency.
- Smooth Chocolate Melting: Use microwave in short 15-20 second bursts, stirring between intervals to create a glossy, lump-free chocolate layer.
- Compact Base Technique: Press oat mixture firmly and evenly with the back of a spatula or clean hands to create a stable, uniform foundation for better texture.
- Storage Smart: Keep bars refrigerated in an airtight container to maintain crispness and prevent chocolate from softening, extending shelf life up to a week.
- Prep Time: 10 minutes
- Cook Time: 2 hours
- Category: Snacks, Desserts
- Method: Mixing
- Cuisine: American
Nutrition
- Serving Size: 15
- Calories: 319
- Sugar: 15 g
- Sodium: 133 mg
- Fat: 21 g
- Saturated Fat: 12 g
- Unsaturated Fat: 8 g
- Trans Fat: 0 g
- Carbohydrates: 32 g
- Fiber: 3 g
- Protein: 5 g
- Cholesterol: 30 mg
Liam O’Sullivan
Founder & Culinary Content Creator
Expertise
Recipe Development, Traditional Irish and European Cuisines, Food Styling and Photography, Culinary Education
Education
Dublin Institute of Technology (DIT) – School of Culinary Arts and Food Technology
Ballymaloe Cookery School
Isabella brings a global spark to the Craft Meats table. Born in Florence and trained at the Apicius International School of Hospitality, she blends classic Italian flavor with modern writing that’s easy to follow and hard to forget.
Her additional training at the Italian Chef Academy fueled her love for well-crafted dishes, especially ones that spotlight beautiful cuts of meat.
She’s a food writer with heart, and a deep love for storytelling through single recipes. Her goal? To help you cook with more confidence and a little more joy, no matter where you start.