Reindeer Cookie Recipe That’s a Fun Holiday Bake
These reindeer delight cookies spark pure holiday magic with their whimsical charm and festive spirit.
Sweet treats like these connect generations through delightful culinary traditions.
Imaginative bakers understand how simple ingredients can create memorable moments of joy.
Holiday baking becomes an art form when creativity meets classic comfort.
Delicate and playful, these cookies promise to enchant both young and mature sweet lovers.
Soft textures and cheerful decorations make each bite a celebration of seasonal cheer.
You will absolutely adore crafting these delightful morsels that bring warmth to winter gatherings.
Let’s dive into a recipe that enhances ordinary ingredients into extraordinary memories.
Reindeer Cookies That Spark Holiday Joy

Ingredients for Reindeer Cookies
Base Ingredients:Decoration Ingredients:Finishing Ingredients:How to Make Reindeer Cookies
Step 1: Whipping Up Magical Dough
In a spacious mixing bowl, cream together butter, vanilla extract, and powdered sugar using an electric mixer. Beat until the mixture becomes silky and light. Gently fold in flour, baking powder, and salt. Slowly add milk one tablespoon at a time until the dough comes together smoothly.
Step 2: Resting Cookie Mixture
Wrap the dough completely in plastic wrap and chill in the refrigerator for minimum 1 hour or overnight. This helps the dough firm up and enhances flavor development.
Step 3: Rolling Out Sweet Circles
Preheat oven to 350°F (175°C). Roll chilled dough on a lightly floured surface to 1/4 inch thickness. Use a large circular cookie cutter to create perfect cookie shapes. Place cookies on parchment-lined baking sheet.
Step 4: Baking Golden Treats
Bake cookies for 9-10 minutes until edges turn delicately golden brown. Remove from oven and let cookies cool completely on a wire rack.
Step 5: Crafting Royal Icing
Combine powdered sugar, meringue powder, and vanilla extract. Gradually add warm water while whisking until stiff peaks form. Separate icing into white and brown batches for decorating.
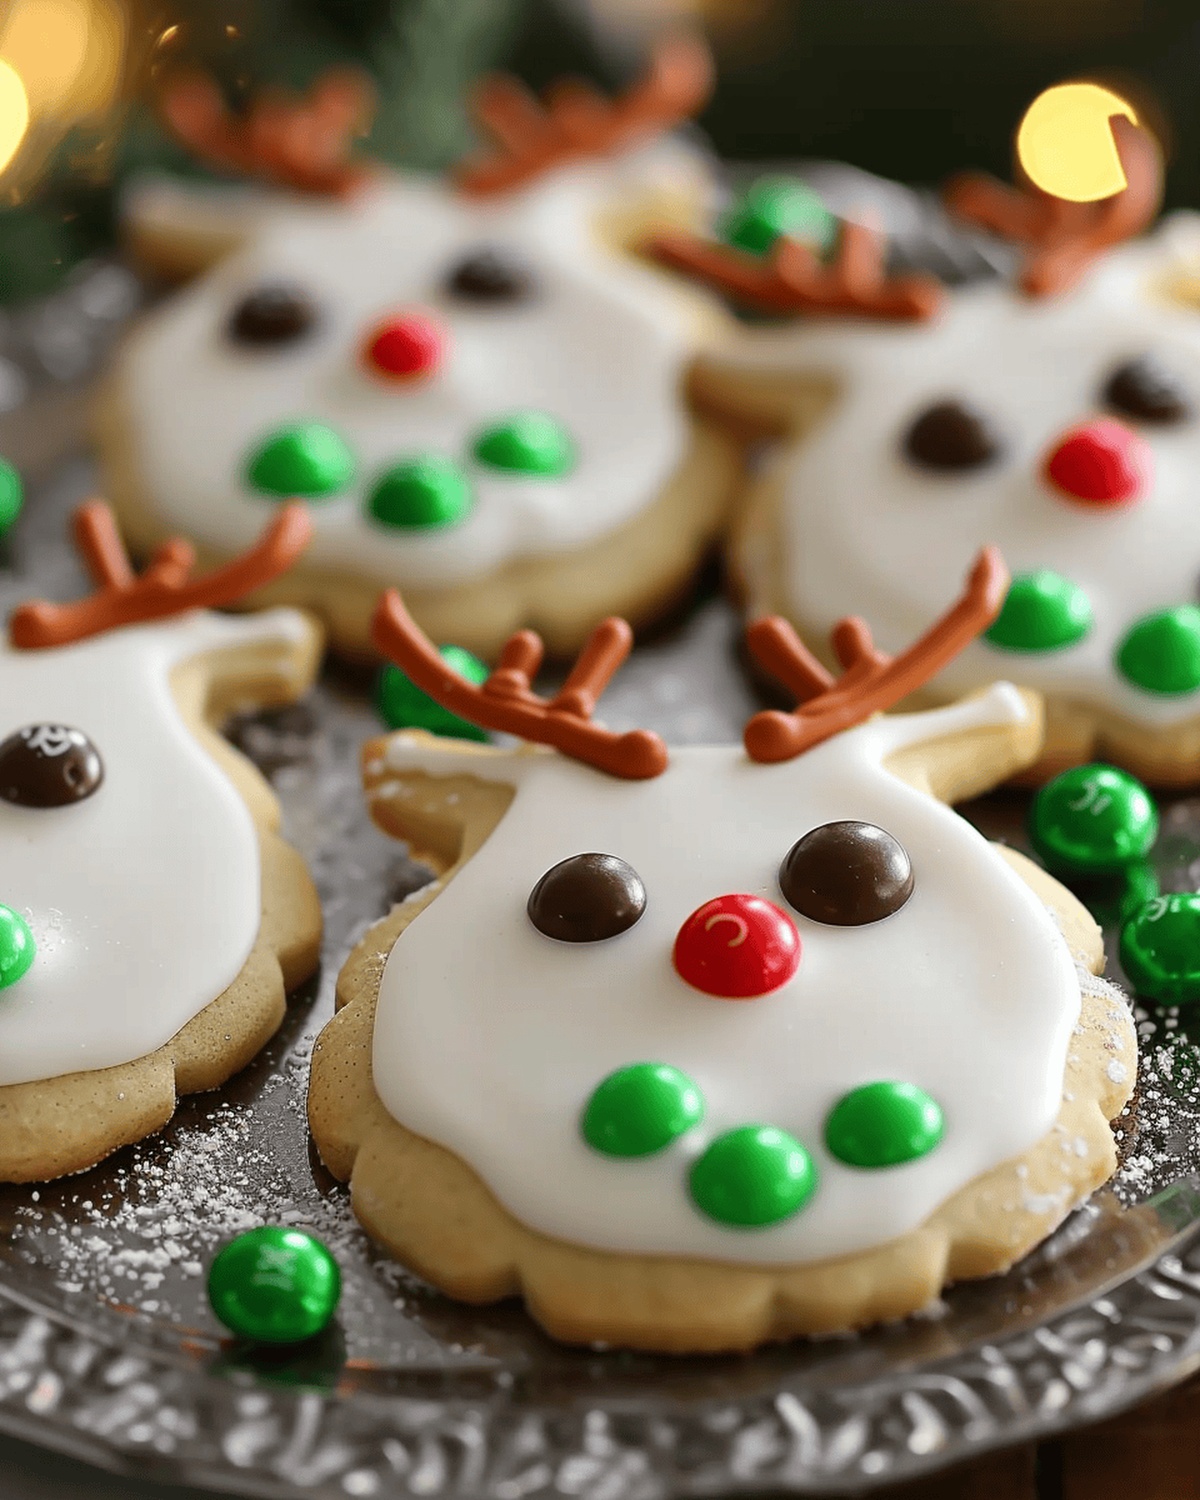
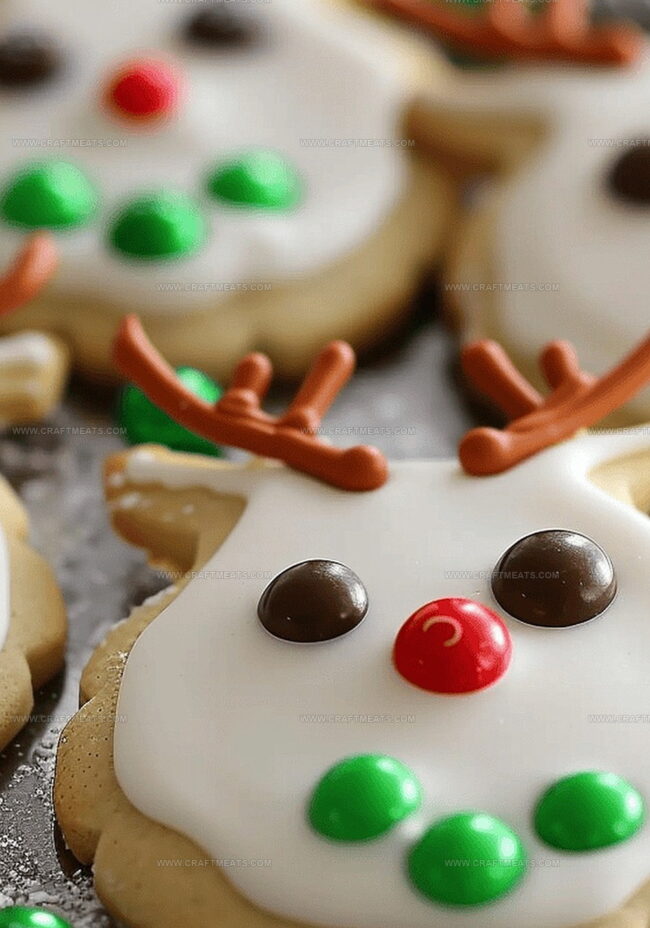
Step 6: Designing Adorable Reindeer
Using white icing, pipe or spread a base coat on each cookie. Create cute reindeer faces with round eyes and smooth surfaces. Once set, add brown antlers using piped icing. Place a green M&M as the signature red nose. Allow decorations to dry completely before serving.
Smart Tips for Reindeer Cookies
How to Store and Reheat Reindeer Cookies
Serving Reindeer Cookies
Reindeer Cookie Ideas and Swaps
Reindeer Cookie FAQs
The dough needs to be refrigerated for at least 1 hour, or you can leave it overnight to firm up completely, which helps prevent spreading during baking.
Yes! You can prepare the dough up to 3 days in advance and store it in the refrigerator, or freeze the unbaked dough for up to 2 weeks for later use.
You can substitute meringue powder with egg whites, but meringue powder provides more stability and is safer for those concerned about raw eggs. If using egg whites, use pasteurized ones to ensure food safety.
Store the completely cooled and decorated cookies in an airtight container at room temperature for up to 5 days. Layer them between sheets of parchment paper to prevent sticking and preserve their adorable design.
Print
Reindeer Delight Cookies Recipe
- Total Time: 30 minutes
- Yield: 24 1x
Description
Nordic holiday magic shines through these Reindeer Delight Cookies, blending sweet nostalgia with festive charm. Crumbly, spiced gems will transport winter memories from Scandinavian kitchens directly to your holiday table.
Ingredients
Dry Ingredients:
- 3 cups (375 grams) all-purpose flour
- 1 teaspoon (5 grams) baking powder
- ¼ teaspoon (1.5 grams) salt
Butter and Sugar Ingredients:
- 1 cup (227 grams) unsalted butter, softened
- 1 ½ cups (180 grams) powdered sugar
- 2 cups (240 grams) powdered sugar
Liquid and Flavoring Ingredients:
- 5 tablespoons (75 milliliters) milk
- 1 teaspoon (5 milliliters) vanilla extract
- 2 tablespoons (30 milliliters) warm water
- 1 ½ tablespoons (22.5 grams) meringue powder
- A few drops of brown liquid food coloring
- A few green M&M’s (for noses)
Instructions
- In a spacious mixing vessel, cream together softened butter, vanilla extract, and powdered sugar using an electric mixer until achieving a silky, uniform texture.
- Gently fold in all-purpose flour, baking powder, and salt into the butter mixture. Incorporate milk incrementally until the dough reaches a cohesive consistency.
- Wrap the freshly prepared dough in plastic film and refrigerate for a minimum of 60 minutes, allowing it to solidify and develop robust flavor.
- Warm the oven to 350°F (175°C). Carefully roll out the chilled dough on a lightly dusted surface to approximately ¼ inch thickness. Utilize a circular cookie cutter to shape the cookies precisely.
- Arrange the formed cookies on a parchment-lined baking sheet, ensuring adequate spacing. Bake for 9-10 minutes until the edges transform into a delicate golden hue.
- Remove cookies and transfer to a cooling rack, allowing them to reach room temperature completely.
- Prepare royal icing by whisking powdered sugar, meringue powder, vanilla extract, and gradually introducing warm water until stiff peaks emerge. Separate icing into white and brown batches.
- Decorate cooled cookies by piping white icing to create the reindeer’s facial features and eyes. Once set, add intricate brown antlers and a vibrant green M&M for the characteristic nose.
Notes
- Chill the dough thoroughly to prevent spreading and maintain the cookie’s shape during baking.
- Use room temperature butter for a smoother, more consistent cookie dough texture.
- Sift dry ingredients to eliminate lumps and ensure even distribution in the mixture.
- Allow cookies to cool completely before decorating to prevent icing from melting or running.
- Work with royal icing quickly as it sets fast and can become difficult to manage.
- Store decorated cookies in a single layer between parchment paper to preserve intricate designs.
- Prep Time: 20 minutes
- Cook Time: 10 minutes
- Category: Desserts, Snacks
- Method: Baking
- Cuisine: Nordic
Nutrition
- Serving Size: 24
- Calories: 140
- Sugar: 11 g
- Sodium: 50 mg
- Fat: 7 g
- Saturated Fat: 4 g
- Unsaturated Fat: 2 g
- Trans Fat: 0 g
- Carbohydrates: 18 g
- Fiber: 0 g
- Protein: 1 g
- Cholesterol: 15 mg
Isabella Rossi
Founder & Culinary Content Creator
Expertise
Recipe Development, Traditional Irish and European Cuisines, Food Styling and Photography, Culinary Education
Education
Dublin Institute of Technology (DIT) – School of Culinary Arts and Food Technology
Ballymaloe Cookery School
Liam is the voice behind many of Craft Meats’ most flavorful features. With roots in Dublin’s smoky barbecue scene and a culinary degree from the Dublin Institute of Technology, he brings time-tested cooking techniques to life.
His training at Ballymaloe Cookery School sharpened his farm-to-table approach, giving him a deep respect for every ingredient he writes about.
He’s not about overcomplicating the process, just helping you cook meat that’s worth talking about. When he’s not writing or grilling, he’s out foraging or nerding out on regional spice blends to add to his next recipe.