
Classic Thumbprint Cookies Recipe with Jam Filling
Soft, buttery cookies have always been a delightful treat that brings comfort to any afternoon.
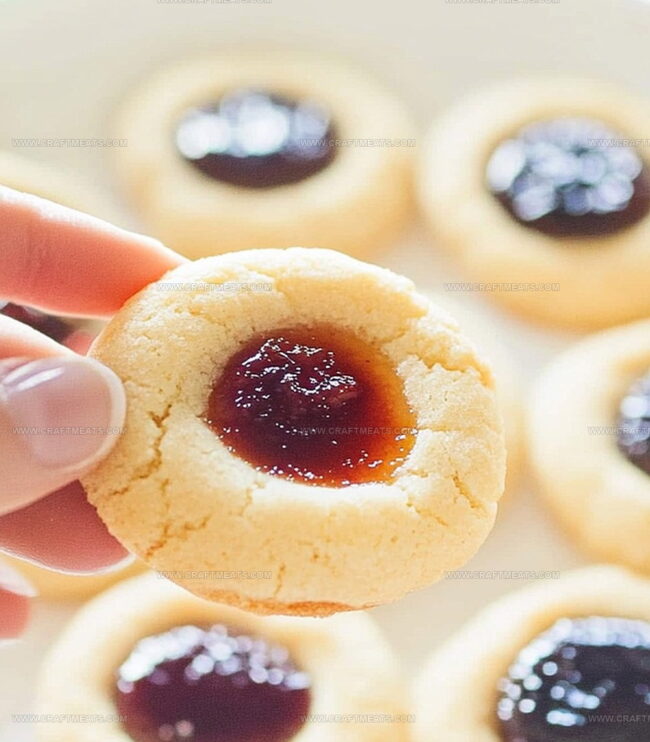
These classic thumbprint cookies with their playful indentation offer a delectable twist on traditional sweet snacks.
Bakers adore the simplicity of pressing a gentle thumb into sweet dough, creating perfect little wells for rich jam or chocolate.
The homemade thumbprint cookies recipe delivers a nostalgic touch that transports you back to childhood kitchens filled with warmth and love.
Each bite promises a delicate crunch followed by a burst of fruity or chocolatey goodness.
The recipe requires just a few simple ingredients and minimal effort, making these cookies an ideal choice for novice and experienced bakers alike.
Whip up a batch and watch them disappear in moments, leaving behind only happy memories and satisfied smiles.
Quick Recipe Overview

Thumbprint Cookies Ingredient Breakdown
For Dough Base:For Filling:For Optional Finishing:Tools To Shape Thumbprint Cookies Cleanly
How To Bake Thumbprint Cookies With A Perfect Center
Mix softened butter and sugar until creamy and smooth. Blend in egg yolks and vanilla for a rich texture. Fold in flour gently to create a soft, pliable dough that holds together easily.
Roll small portions of dough into neat round balls. Create a cozy center indent using your thumb or a small spoon. Press carefully to make a perfect little pocket for sweet filling.
Carefully spoon a dollop of your favorite jam into each cookie’s center. Choose vibrant fruit preserves that will add a burst of color and flavor. Don’t overfill to prevent messy baking.
Place cookies in a warm oven and bake until edges turn a delicate golden color. The aroma will fill your kitchen with sweet anticipation. Allow cookies to rest briefly on the baking sheet before transferring to a cooling rack, letting them settle and become perfectly crisp.
Filling Options For Thumbprint Cookies You’ll Enjoy
Serving Thumbprint Cookies For Any Occasion
Storage Tips To Keep Thumbprint Cookies Tidy
Print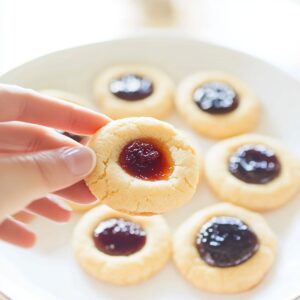
Soft Thumbprint Cookies Recipe
- Total Time: 29 minutes
- Yield: 23 1x
Description
Irresistible thumbprint cookies blend buttery dough with sweet jam centers, creating a classic treat. German bakers perfected these delicate cookies that invite warmth and comfort in each delightful bite.
Ingredients
- 1 cup unsalted butter, softened
- ½ cup granulated sugar
- 2 large egg yolks
- 2 cups all-purpose flour
- 1 teaspoon vanilla extract
- ¼ teaspoon salt
- ½ cup fruit jam or preserves (e.g., raspberry, strawberry, apricot)
Instructions
- Dough Preparation: Cream butter and sugar until light and fluffy. Blend in egg yolks and vanilla extract. Gently incorporate flour and salt, kneading into a smooth, pliable dough.
- Cookie Shaping: Roll dough into walnut-sized spheres. Position on parchment-lined baking sheet with adequate spacing. Using your thumb or a small spoon, create a centered well in each cookie, ensuring a deep enough indent to hold jam.
- Jam Filling: Carefully fill each cookie’s depression with jam, maintaining a precise amount to prevent spillage during baking. Distribute jam evenly across all cookies.
- Baking Process: Position rack in the middle of a preheated oven. Bake at the specified temperature until cookie edges turn a delicate golden brown, indicating optimal doneness and a crisp exterior.
- Cooling and Finishing: Allow cookies to rest momentarily on the baking sheet to set their structure. Transfer to a wire cooling rack, permitting them to cool completely. Once at room temperature, the cookies will develop their full, rich flavor profile and achieve the perfect texture.
Notes
- Butter Consistency Matters: Ensure butter is softened but not melted for the perfect dough texture, allowing smooth blending and optimal cookie structure.
- Jam Selection Strategy: Choose thick, high-quality preserves that won’t run during baking, such as apricot or raspberry, to maintain the cookie’s elegant appearance.
- Thumb Technique Precision: Create uniform wells with gentle, consistent pressure to prevent cookie cracking and ensure even jam distribution.
- Cooling Crucial: Allow cookies to cool completely on the rack to set their structure and develop a delightful crisp-tender texture that makes thumbprint cookies irresistible.
- Prep Time: 15 minutes
- Cook Time: 14 minutes
- Category: Desserts, Snacks
- Method: Baking
- Cuisine: American
Nutrition
- Serving Size: 23
- Calories: 139
- Sugar: 5 g
- Sodium: 32 mg
- Fat: 10 g
- Saturated Fat: 6 g
- Unsaturated Fat: 4 g
- Trans Fat: 0 g
- Carbohydrates: 13 g
- Fiber: 0.5 g
- Protein: 1.5 g
- Cholesterol: 37 mg
Liam O’Sullivan
Founder & Culinary Content Creator
Expertise
Recipe Development, Traditional Irish and European Cuisines, Food Styling and Photography, Culinary Education
Education
Dublin Institute of Technology (DIT) – School of Culinary Arts and Food Technology
Ballymaloe Cookery School
Isabella brings a global spark to the Craft Meats table. Born in Florence and trained at the Apicius International School of Hospitality, she blends classic Italian flavor with modern writing that’s easy to follow and hard to forget.
Her additional training at the Italian Chef Academy fueled her love for well-crafted dishes, especially ones that spotlight beautiful cuts of meat.
She’s a food writer with heart, and a deep love for storytelling through single recipes. Her goal? To help you cook with more confidence and a little more joy, no matter where you start.