Island Paradise: Hawaiian Pineapple Coconut Dream Cake Recipe
Sweet tropical breezes drift through this heavenly pineapple coconut dream cake that captures the essence of island paradise.
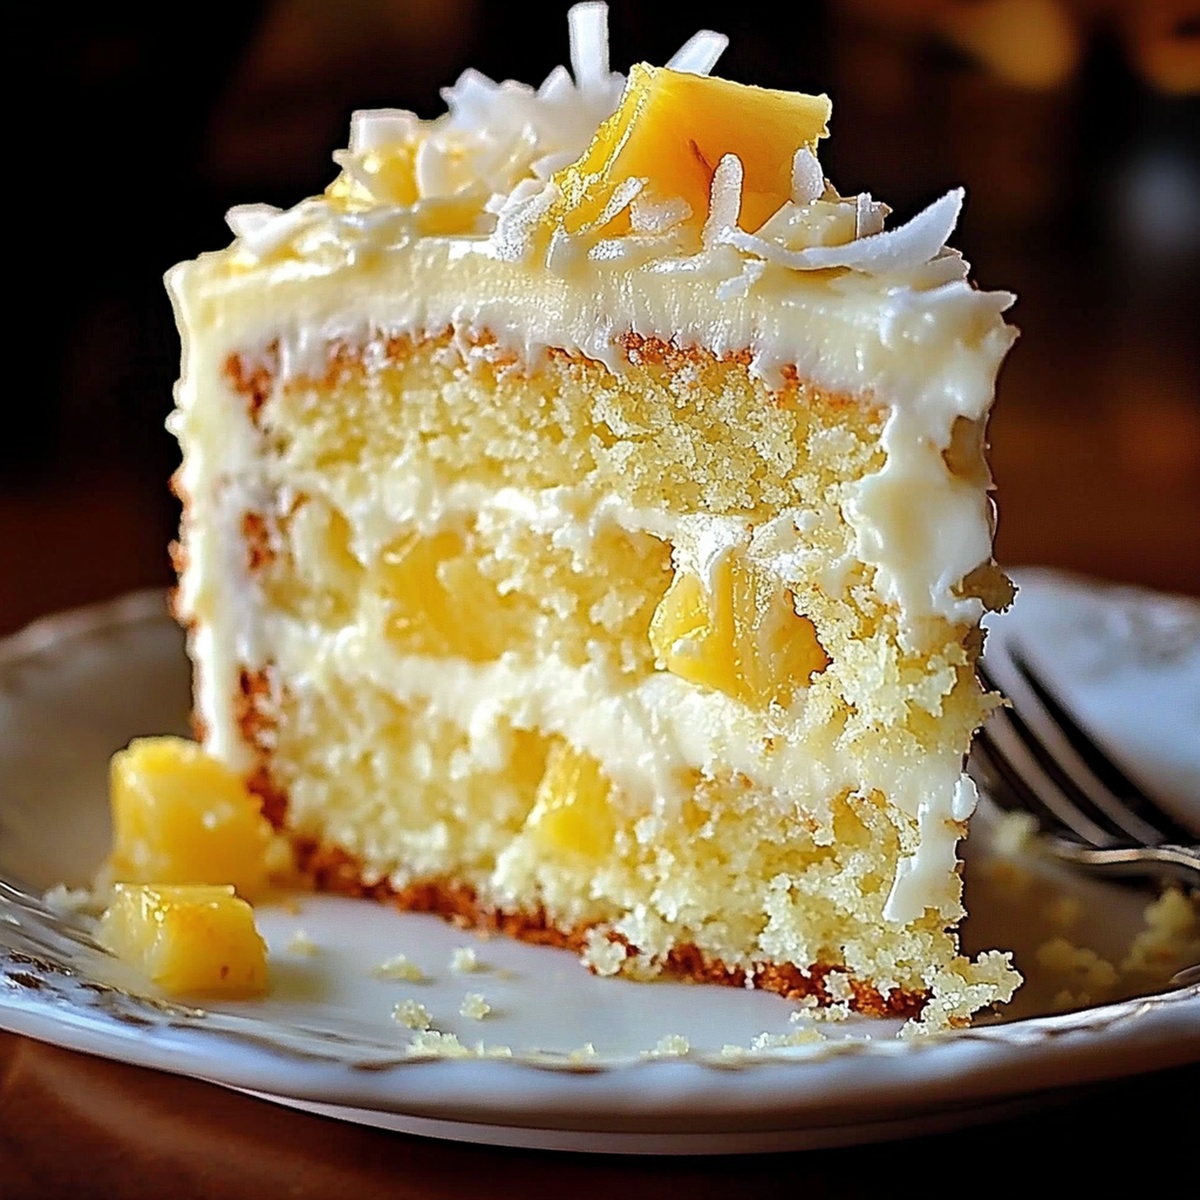
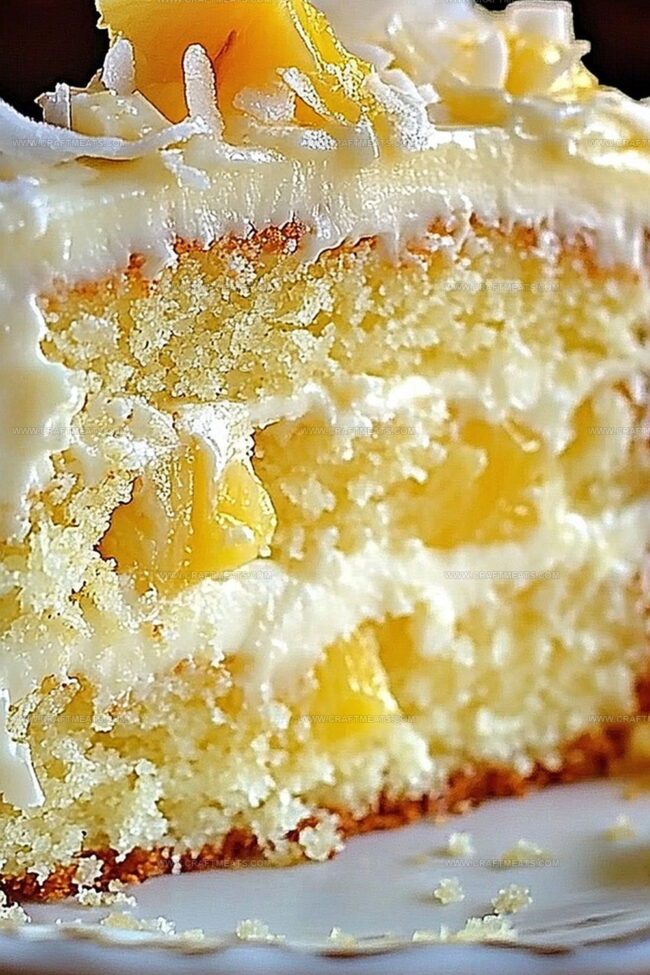
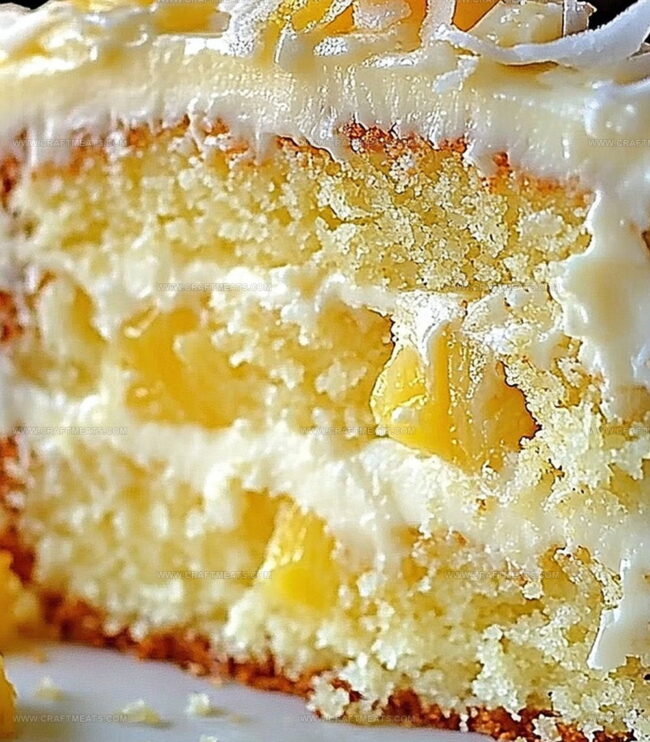
Soft, moist layers sparkle with tangy fruit and creamy coconut undertones.
Each slice promises a delectable journey through Hawaiian-inspired flavors that dance on your palate.
The cake combines classic baking techniques with vibrant ingredients that sing of sunshine and relaxation.
Delicate crumbs meld with rich, smooth frosting in a dessert that transforms an ordinary afternoon into a mini vacation.
Creamy coconut and bright pineapple weave together, creating a dessert that feels both comforting and exotic.
Dive into this dreamy recipe and let your taste buds sail away to tropical bliss.
Quick Recipe Overview
What’s Inside Hawaiian Pineapple Coconut Dream Cake
For Cake Base:For Soaking Mixture:For Topping and Garnish:Cake Tools For Hawaiian Pineapple Coconut Dream Cake
How To Bake Hawaiian Pineapple Coconut Dream Cake
Warm up your oven to create the perfect baking environment. Coat your baking pan with a light layer of grease to ensure smooth cake removal.
Blend yellow cake mix with a tropical twist by incorporating crushed pineapple instead of water. The juicy fruit will infuse the cake with extra moisture and flavor. Pour the batter into the prepared pan, creating a smooth surface.
Let the cake transform in the oven, watching it rise and turn golden. Check for doneness by inserting a toothpick – it should come out clean, signaling a perfectly baked cake.
While the cake is still warm, create little pathways using a fork. Gently pour a mixture of sweetened condensed milk and coconut milk, allowing it to seep into every delicious crevice. Sprinkle shredded coconut across the top for a tropical texture.
Whip up a cloud-like cream using heavy cream, powdered sugar, and a hint of vanilla. Spread this dreamy layer across the cooled cake, creating a smooth canvas.
Enhance the cake’s appearance with toasted coconut flakes and optional fresh pineapple pieces. Chill in the refrigerator to let the flavors mingle and intensify.
Tips To Make Hawaiian Pineapple Coconut Dream Cake Better
Fun Serving Ideas For Hawaiian Pineapple Coconut Dream Cake
Storing Hawaiian Pineapple Coconut Dream Cake
Print
Tropical Pineapple Coconut Dream Cake Recipe
- Total Time: 1 hour 45 minutes
- Yield: 11 1x
Description
Tropical Hawaiian pineapple coconut dream cake blends island flavors in a delightful dessert. Layers of moist coconut cake, tangy pineapple filling, and creamy frosting create a paradise on your plate.
Ingredients
- 1 can (20 oz / 567 g) crushed pineapple, undrained
- 1 can (14 oz / 397 g) sweetened condensed milk
- 1 cup (240 ml / 8 fl oz) coconut milk
- 1 box yellow cake mix
- Eggs (as per box instructions)
- Oil (as per box instructions)
- Water (as per box instructions)
- 2 cups (480 ml / 16 fl oz) heavy whipping cream
- ¼ cup (30 g) powdered sugar
- 1 tsp vanilla extract
- 1 cup (80 g) shredded sweetened coconut
- ½ cup (40 g) toasted coconut flakes
- Pineapple slices or chunks (optional)
Instructions
- Preparation: Preheat oven to 350F (175C) and grease a 9×13-inch baking pan with flour, ensuring complete surface coverage.
- Batter Creation: Blend yellow cake mix with undrained crushed pineapple, mixing until smooth and consistent, then pour into prepared pan and distribute evenly.
- Initial Baking: Bake for 25-30 minutes, checking doneness with a toothpick that should emerge clean when inserted into the center.
- Flavor Infusion: While cake is warm, puncture surface with a fork, then whisk sweetened condensed milk and coconut milk together and pour over cake, allowing complete absorption.
- Coconut Layer: Sprinkle shredded coconut across the surface, creating an even tropical coating.
- Cooling Process: Let cake cool completely at room temperature to allow flavors to meld and settle.
- Cream Topping: Whip heavy cream with powdered sugar and vanilla extract until stiff peaks form, then spread evenly across cooled cake.
- Final Touches: Garnish with toasted coconut flakes and optional fresh pineapple slices.
- Serving Preparation: Refrigerate for at least one hour to enhance flavors and achieve optimal serving temperature, then slice and enjoy the tropical dessert.
Notes
- Pineapple Substitution Strategy: Use fresh or canned crushed pineapple with no added sugar for optimal moisture and natural sweetness, ensuring the cake remains moist without excessive sweetness.
- Milk Absorption Technique: Pierce cake holes carefully and evenly to guarantee uniform milk distribution, preventing dry spots and creating consistent, luscious texture throughout the dessert.
- Coconut Enhancement Tip: Toast coconut flakes beforehand in a dry skillet to develop deeper, nuttier flavor and add sophisticated golden-brown color to the cake’s appearance.
- Chilling Precision: Refrigerate cake for at least 2-3 hours before serving to allow complete flavor melding and achieve ideal creamy consistency, making the dessert more refreshing and structured.
- Prep Time: 15 minutes
- Cook Time: 30 minutes
- Category: Desserts
- Method: Baking
- Cuisine: Hawaiian
Nutrition
- Serving Size: 11
- Calories: 430
- Sugar: 34 g
- Sodium: 250 mg
- Fat: 28 g
- Saturated Fat: 18 g
- Unsaturated Fat: 6 g
- Trans Fat: 0 g
- Carbohydrates: 43 g
- Fiber: 1 g
- Protein: 5 g
- Cholesterol: 80 mg
Liam O’Sullivan
Founder & Culinary Content Creator
Expertise
Recipe Development, Traditional Irish and European Cuisines, Food Styling and Photography, Culinary Education
Education
Dublin Institute of Technology (DIT) – School of Culinary Arts and Food Technology
Ballymaloe Cookery School
Isabella brings a global spark to the Craft Meats table. Born in Florence and trained at the Apicius International School of Hospitality, she blends classic Italian flavor with modern writing that’s easy to follow and hard to forget.
Her additional training at the Italian Chef Academy fueled her love for well-crafted dishes, especially ones that spotlight beautiful cuts of meat.
She’s a food writer with heart, and a deep love for storytelling through single recipes. Her goal? To help you cook with more confidence and a little more joy, no matter where you start.